Home GCX HRM System How-to Guides Article
How to Update Your Profile Picture & Bio on GCX Services
Posted on 2025-08-14Your profile is the first thing colleagues and partners see on GCX Services — so why not make it look professional and up-to-date?
In this guide, we’ll walk you through how to update your profile picture and bio in just a few minutes.
Step 1: Log In
Open your browser and go to https://gcxservices.net/.
Enter your GCX credentials and sign in.
Step 2: Go to User Settings
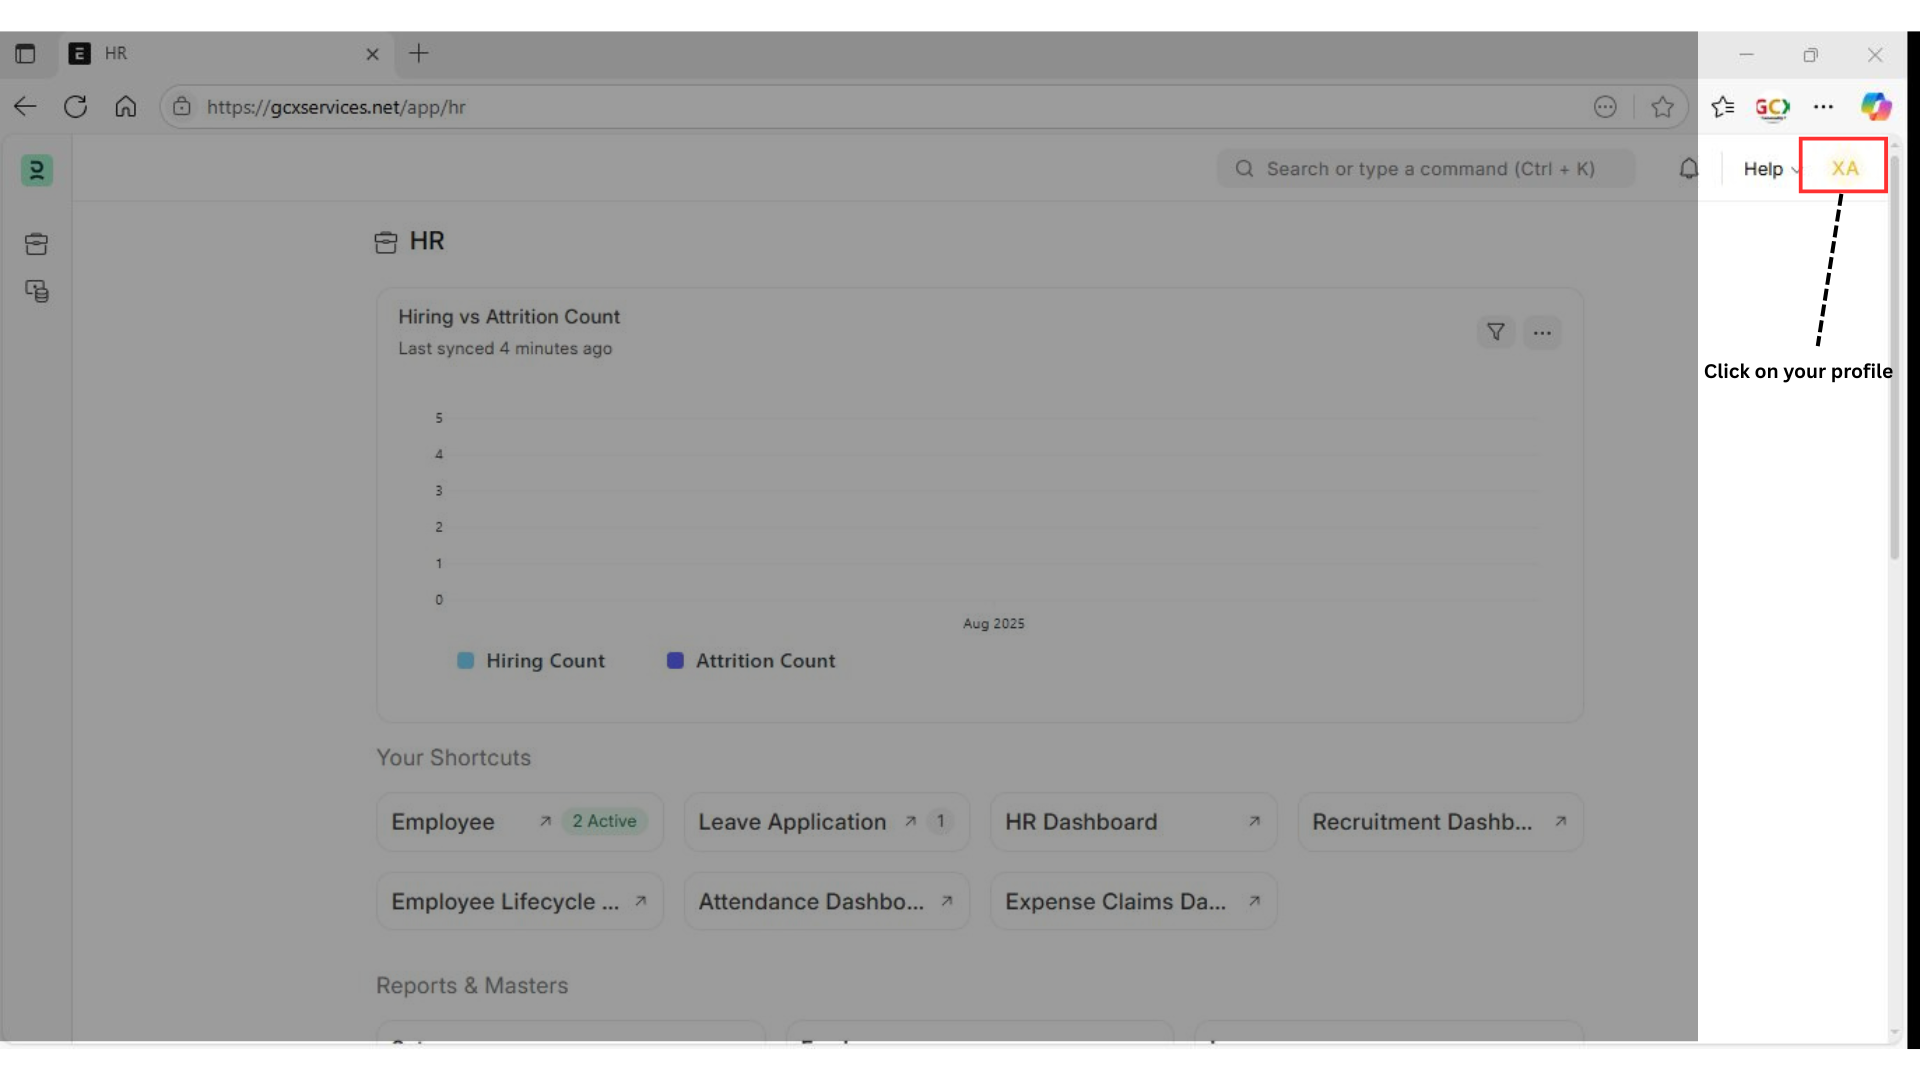
Click on your profile icon at the top-right corner of the screen.
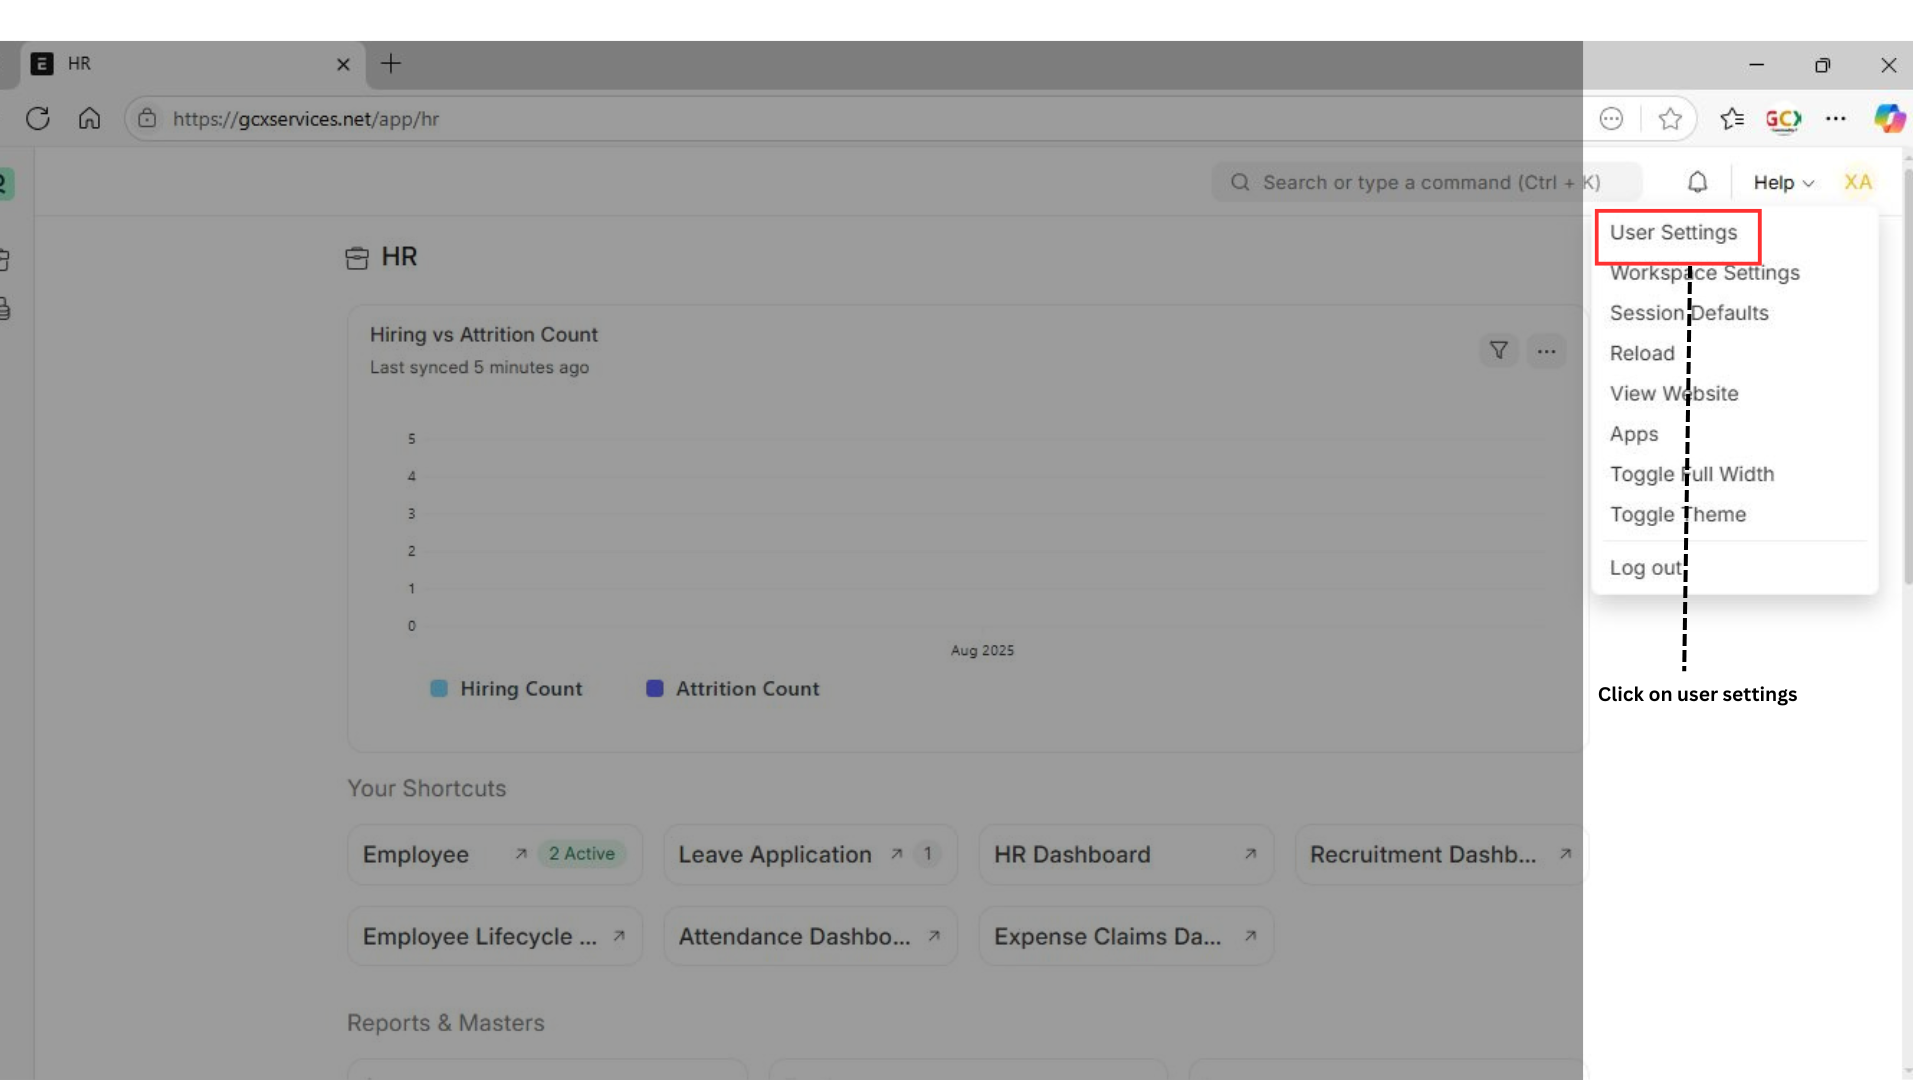
From the dropdown menu, select “User Settings.”
Step 3: Change Your Profile Picture
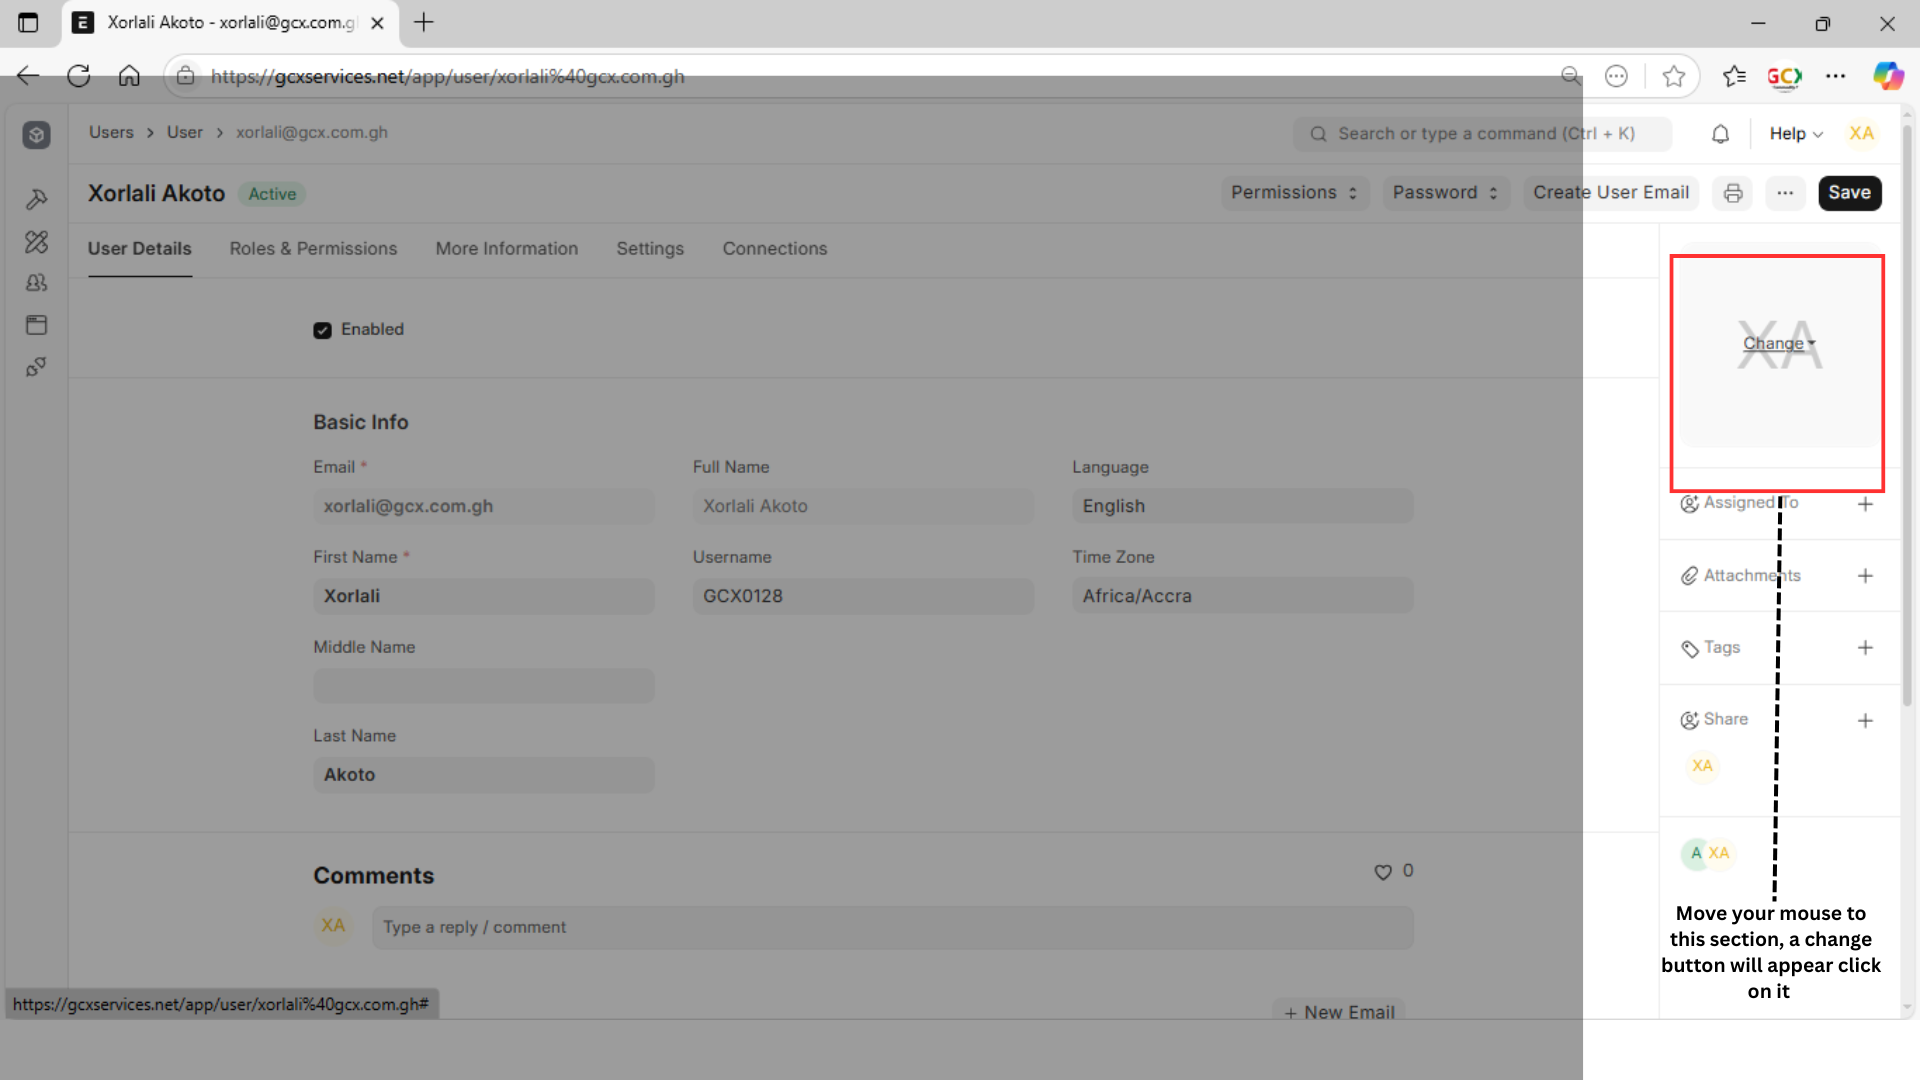
On the User Settings page, click the “Change” button near your current profile picture.
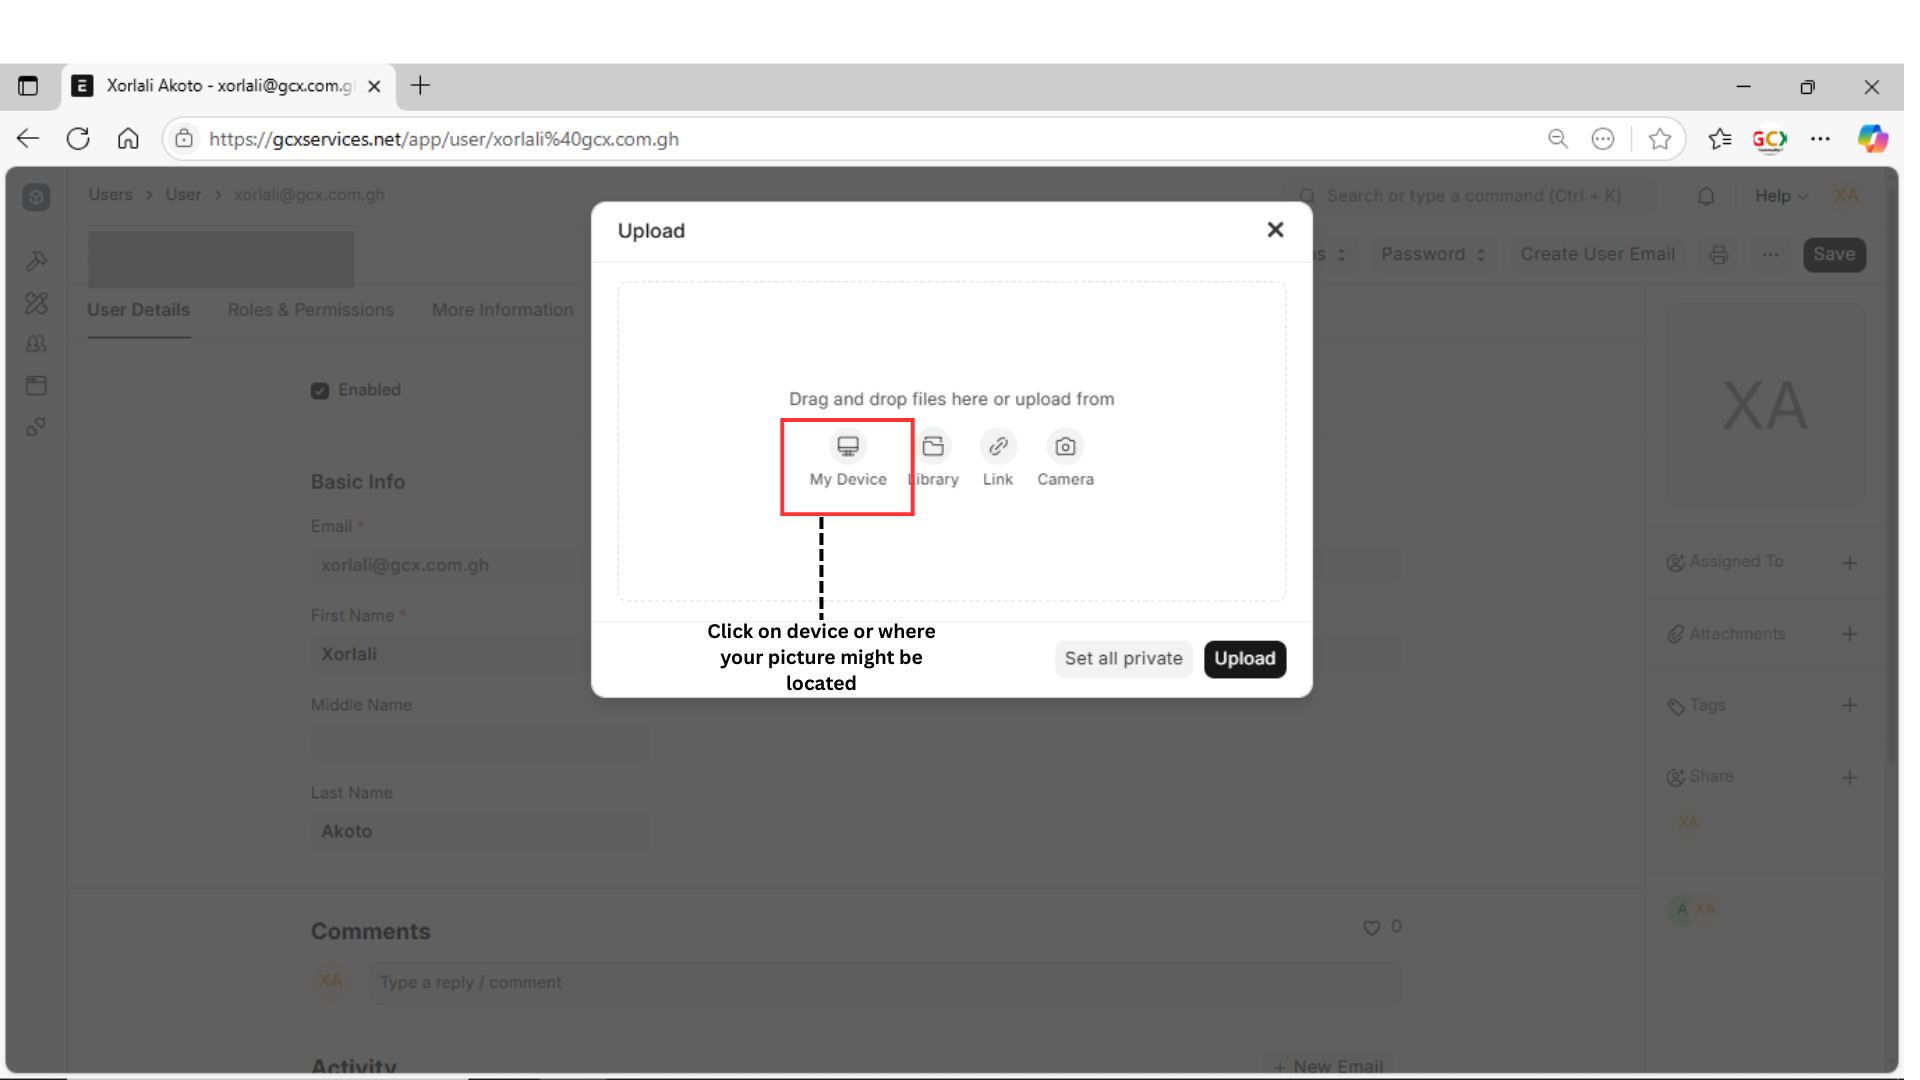
A pop-up will appear asking where you’d like to get your photo:
My Device – upload from your computer.
Camera – take a new photo instantly.
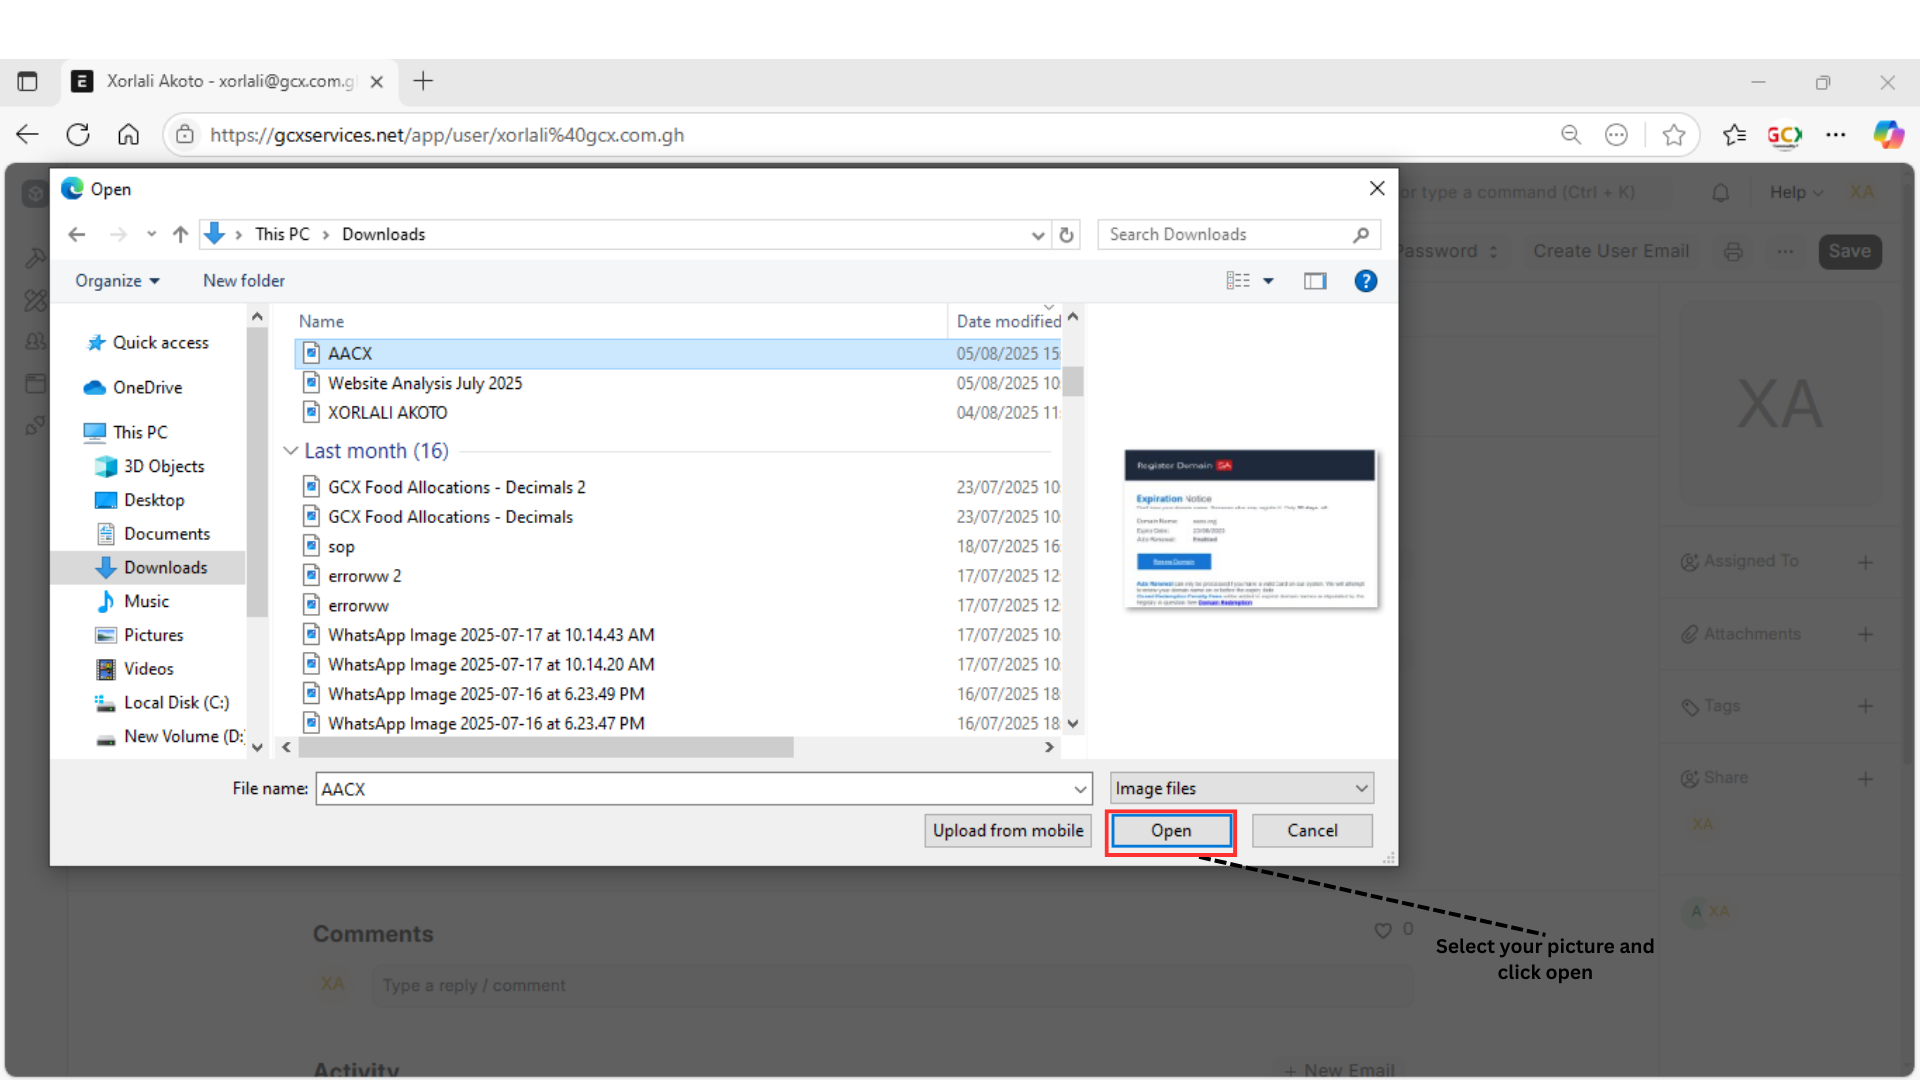
Browse to your chosen file (e.g., go to your Downloads folder and select your image).
Click Open to confirm.
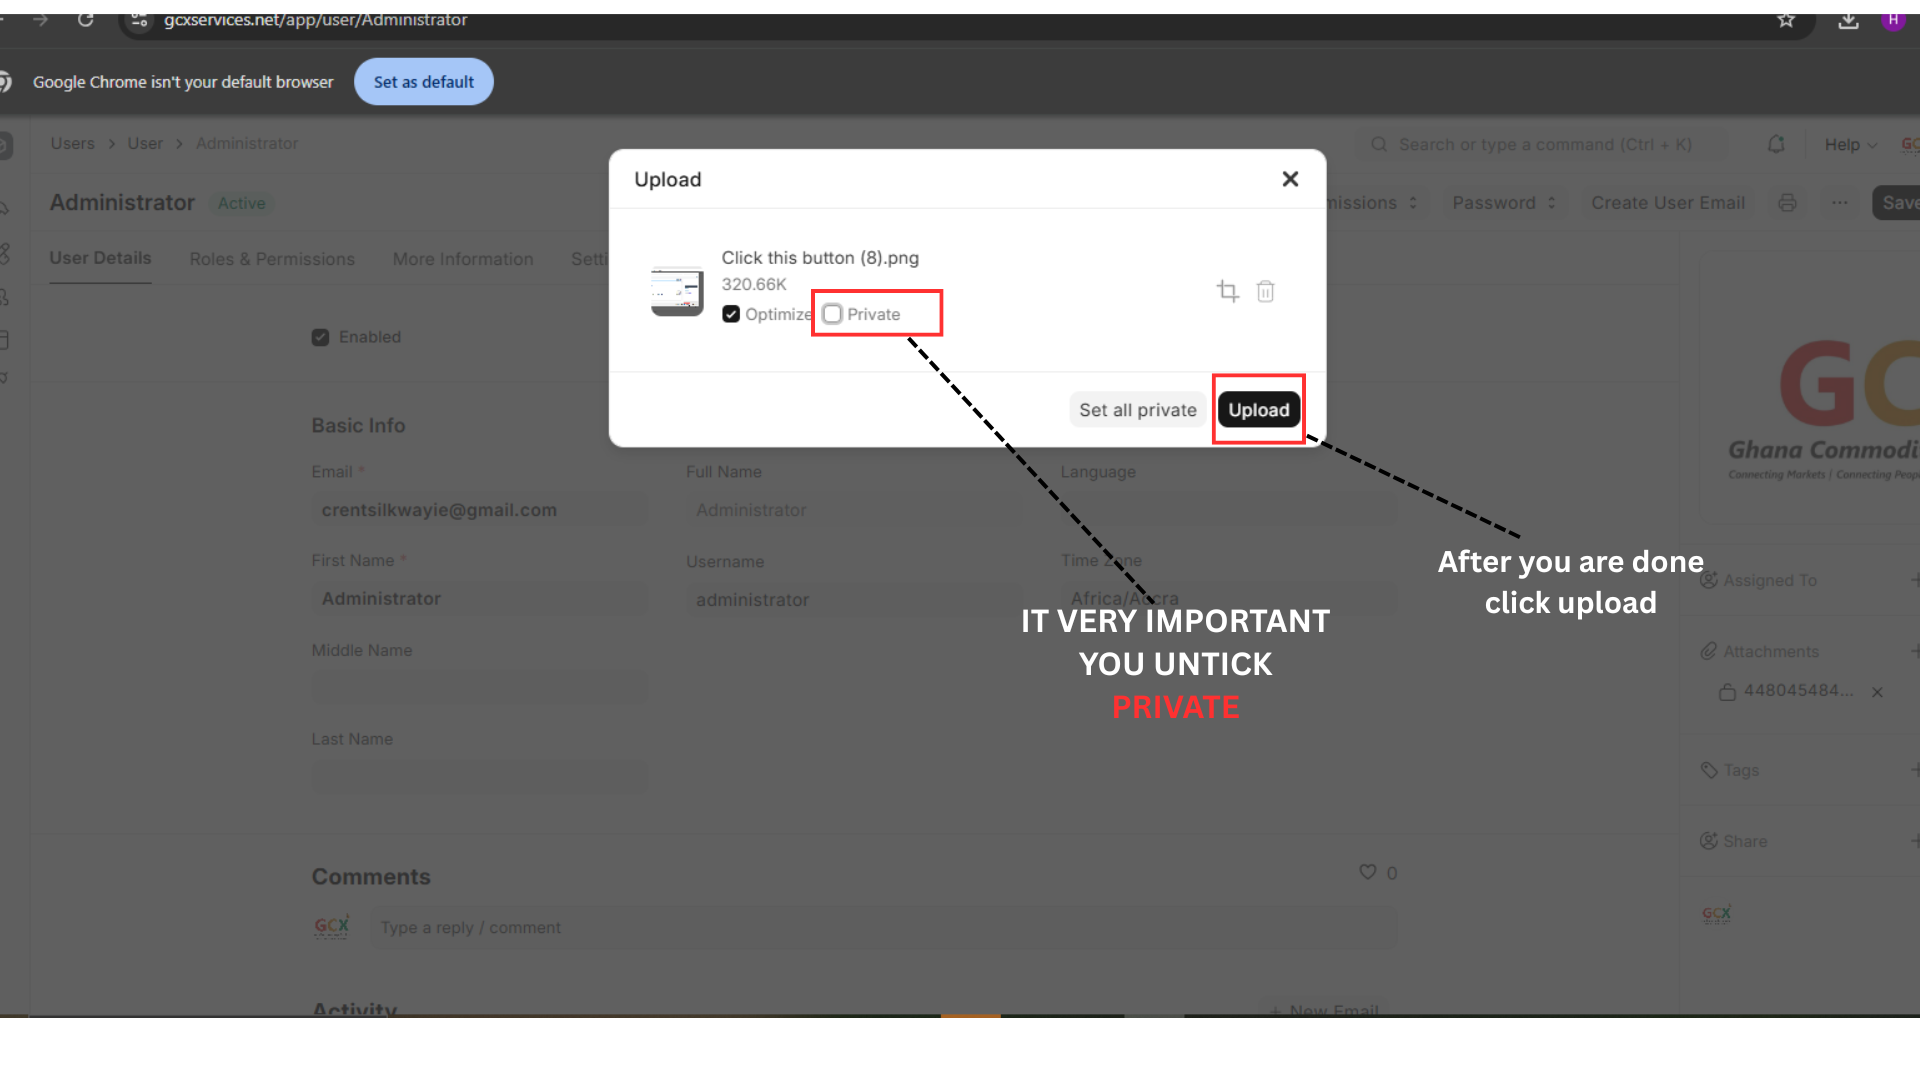
Step 4: Adjust Privacy & Upload
Make sure you set the profile upload to "set all public"
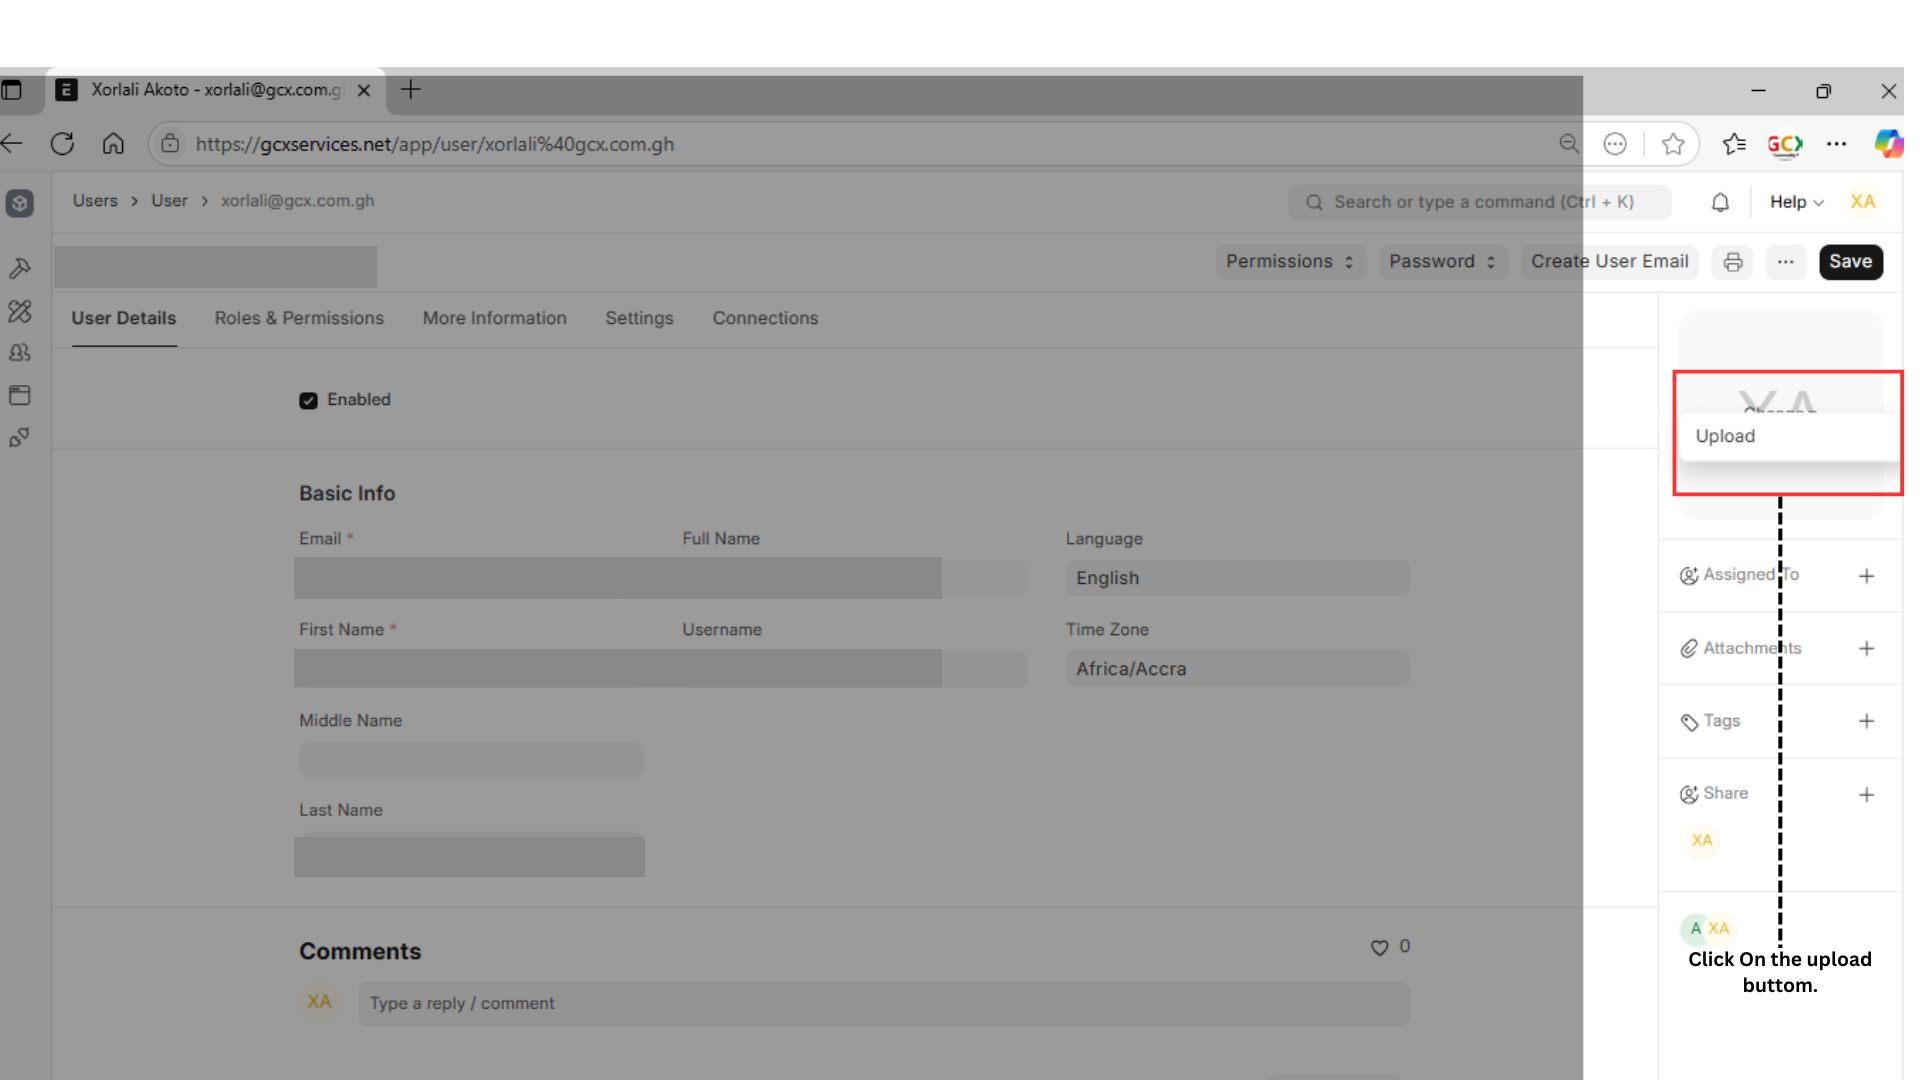
Click Upload to save the change.
Confirmation: Your new picture should appear immediately.
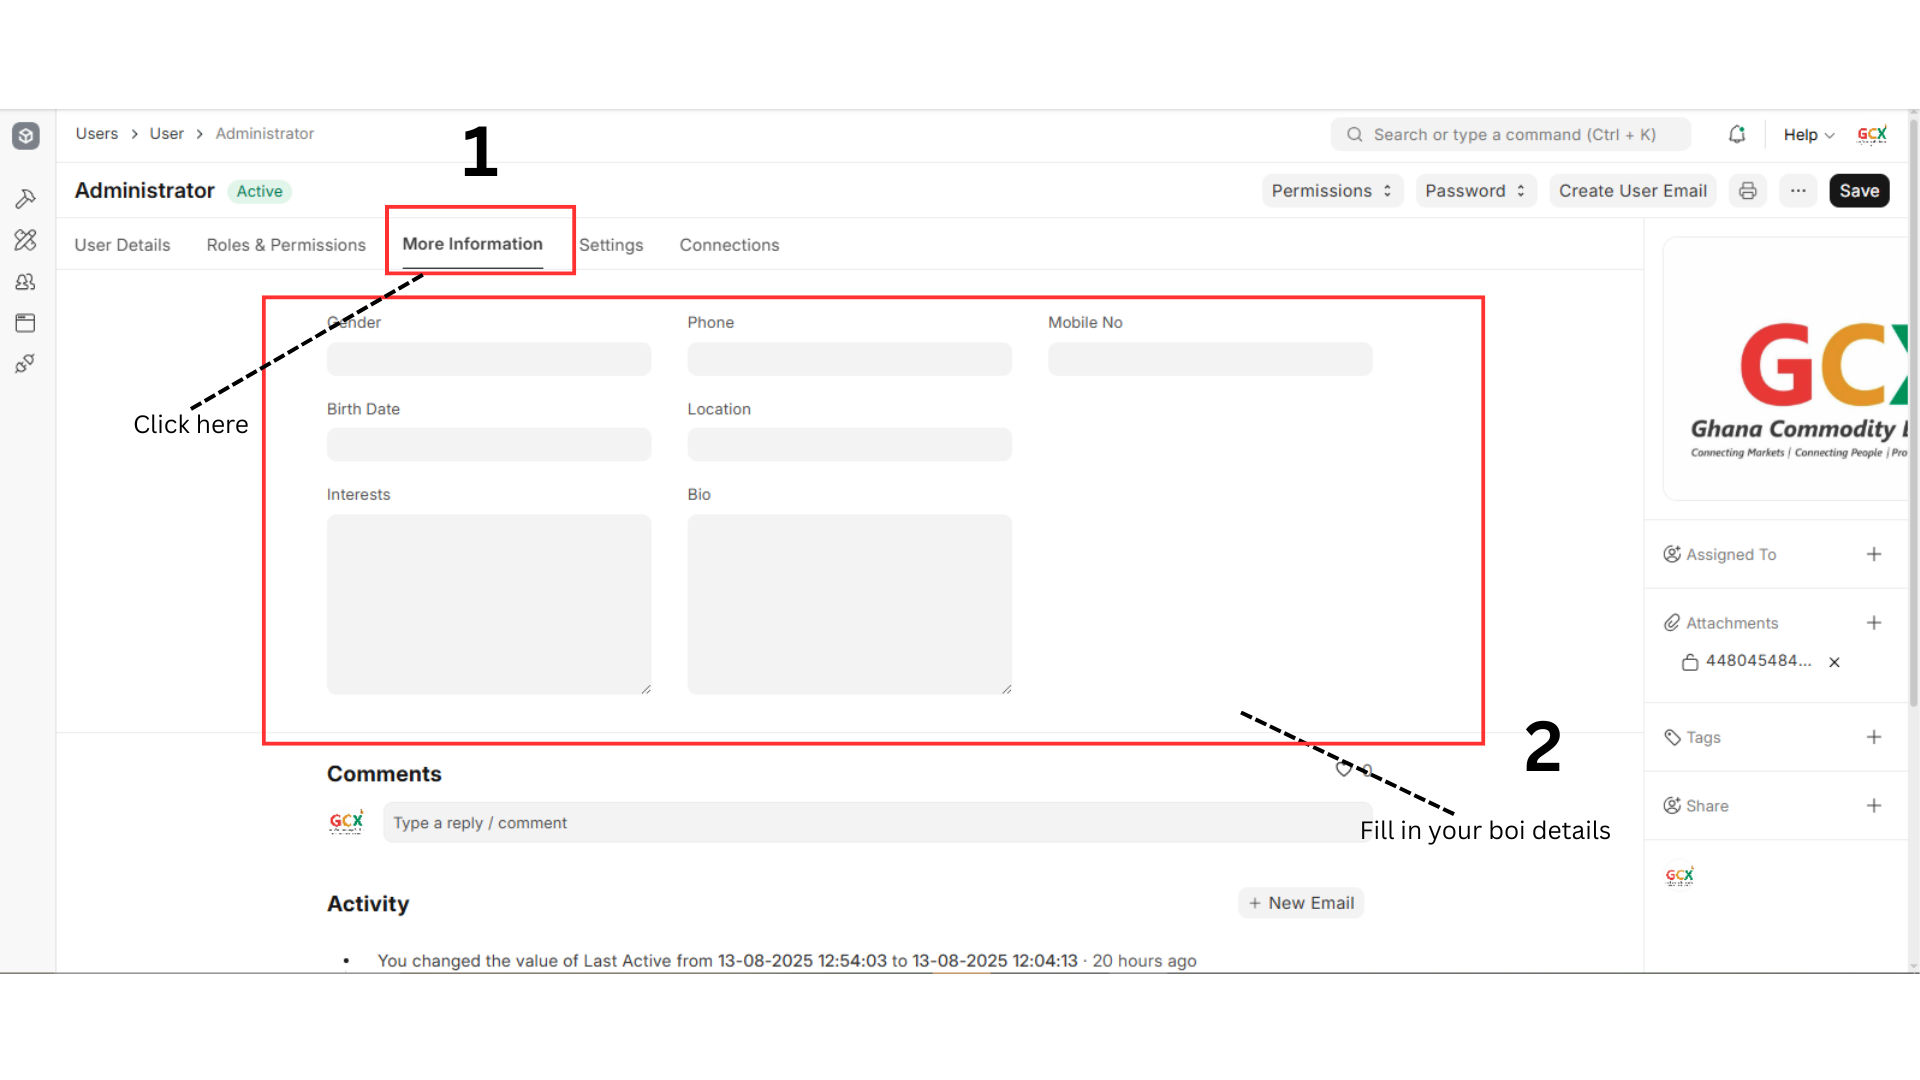
Step 5: Update Your Bio & Details
Go to the “More Information” tab.
Fill in your details:
Birth Date
Interests
Location
Bio (a short description about yourself)
Click Save to apply your changes.
Key Notes
File Types: JPG and PNG are supported.
Size Limit: Keep your image under 5MB for best results.
Auto-Sync: Your updates show immediately — including your “Last Active” timestamp.
Troubleshooting
If the pop-up doesn’t appear, check your browser permissions for file access.
If you get an error when uploading, verify that your image size is below the limit and is in a supported format.
Found this article helpful?
[ 2 Out of 2 Found Helpful ]

